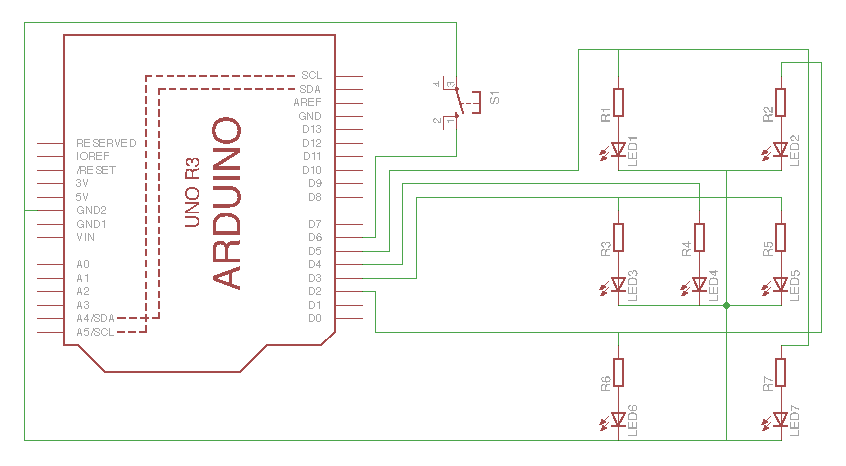
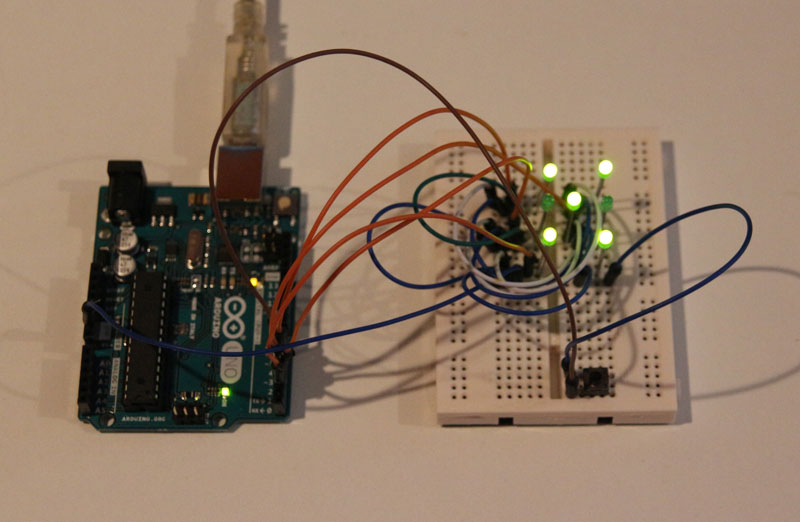
This is about as simple an Arduino project as you can build that still has a real-world use. If you’re comfortable with getting the ‘Blink’ sketch running, then you should have no problem with constructing this electronic dice. If, however, you’re an Arduino master looking to learn about Arizona Microchip’s PIC microcontrollers, then read on, as in part 2 I’ll be implementing the same functionality with a circuit based around a PIC 12F629 coded in assembler.
The circuit is pretty simple; a simple push-button is pressed to “throw” the dice, and the result is displayed as a familiar dot-pattern for a few seconds before turning off to wait for the next throw. The “randomness” is in generated by having a counter that continuously loops through the values 1 to 6 very quickly until a button is pressed. The moment the button is pressed the counter is stopped and its value is displayed as a dice dot-pattern.
Hardware
In addition to an Arduino (I’ve used an UNO R3), you’ll need a push-button switch and seven LEDs with appropriate current limiting resistors (or you could do what I did and use LEDs with built in resistors to save some complication).

Software
Much like the hardware, the software sketch is nice and simple:
// Arduino Dice
// Simon Buckwell
// July 2015

// variables
int d = 0; // dice value

void setup()
{
  // set up GPIO pins
  pinMode(2, OUTPUT); // GPIO 2 - controls LED2 and LED6
  pinMode(3, OUTPUT); // GPIO 3 - controls LED3 and LED5
  pinMode(4, OUTPUT); // GPIO 4 - controls LED4
  pinMode(5, OUTPUT); // GPIO 5 - controls LED1 and LED7
  pinMode(6, INPUT_PULLUP); // GPIO 6 - detects push-button
}

void loop()
{
  // turn all LEDs off
  digitalWrite(2, LOW);
  digitalWrite(3, LOW);
  digitalWrite(4, LOW);
  digitalWrite(5, LOW);

  // loop through values 1 to 6 until the push-button is pressed
  do
  {
    d = d % 6;
    d++;
  } while (digitalRead(6) == HIGH);

  // display value as dot-pattern
  if (d == 1)
  {
    // dot-pattern for 1 - turn on LED4
    digitalWrite(4, HIGH);
  }
  else if (d == 2)
  {
    // dot-pattern for 2 - turn on LED2 and LED6
    digitalWrite(2, HIGH);
  }
  else if (d == 3)
  {
    // dot-pattern for 3 - turn on LED2, LED4 and LED6
    digitalWrite(2, HIGH);
    digitalWrite(4, HIGH);
  }
  else if (d == 4)
  {
    // dot-pattern for 4 - turn on LED1, LED2, LED6 and LED7
    digitalWrite(2, HIGH);
    digitalWrite(5, HIGH);
  }
  else if (d == 5)
  {
    // dot pattern for 5 - turn on LED1, LED2, LED4, LED6 and LED7
    digitalWrite(2, HIGH);
    digitalWrite(4, HIGH);
    digitalWrite(5, HIGH);
  }
  else
  {
    // dot-pattern for 6 - turn on LED1, LED2, LED3, LED5, LED6 and LED7
    digitalWrite(2, HIGH);
    digitalWrite(3, HIGH);
    digitalWrite(5, HIGH);
  }

  // wait 3 seconds
  delay(3000);
}


